Featured

Black beauty magic

I think I have a crush on Emerald Erin…

šŸ¤« shh donā€™t tell my husband.

Venturing into bra making was really just a matter of time for me. Iā€™ve always had a minor obsession with lingerie. Then kids came and with them all the ugly nursing bras and I can tell you right now, thereā€™s nothing that makes me feel sluggish and unattractive like tired, ill-fitting and boring underwear.

I donā€™t really have a good explanation why I chose Erinā€™s Black Beauty as my first underwire pattern. Maybe itā€™s the aesthetic or Erin herself… cannot tell you but Iā€™m very glad I did. My only complaint is that my measurements put me between sizes and I ended up buying the pattern twice because my actual size was in the other size group than I purchased. I then found out that Erin has a great tutorial on ā€œsister sizingā€ Black Beauty so if that happens to you donā€™t repeat my mistake.

I have now made 5 versions of it, including a couple of test bras and I have a few pointers for you if youā€™ve never made an underwire bra but are keen to get started:

1) your first one will probably not fit you perfectly so do not use your expensive lush fabric on the first go or youā€™ll end up disappointed

Test 1
Pretty-ish but unwearable

2) I try to avoid polyester in all of my makes but thereā€™s no way around it in lingerie. Cotton thread will break from tension eventually and your pretty make will be damaged.

Toile 2: fit perfected but cotton thread snapped after second wear

3) itā€™s all about the underwire. Make sure it frames your breast tissue but doesnā€™t dig into it.

4) join a dedicated bra sewing group. Sewing community is awesome and thereā€™s always someone able and willing to help

5) make a fitting band. If youā€™re short on time, your tattas arenā€™t too asymmetrical you can always get away with w partial toile (see the band together, one cup and youā€™ll get the idea of the fit).

Not pretty? No problem! Itā€™s all about the fit

If I was to recommend an underwire pattern to start from it actually would be the Black Beauty.

The instructions are clear and detailed and if youā€™ve never tried a bra before Erinā€™s got you covered. Plus you can purchase bra kits from her and that takes away all the hassle of trying to find all the elastics and hardware.

Below are two sets I made from those kits (I ended up with plenty of leftover fabric so yay!)

Outside
Inside
Megan Nielsen Accacia
Matchy matchy

Iā€™m totally hooked. Bra making is magical and far less difficult than it looks!

Till the next time!

Got to love Edie

I will never understand how Sew Over It ā€œWork to weekendā€ ebook is not more popular in the sewing community… Itā€™s absolutely packed with gorgeous patterns most of which are timeless.

This post however will focus on Edie pattern alone and why I love it so much that I already made three versions, have a fourth one cut out and Iā€™m sure that wonā€™t be the end of it.

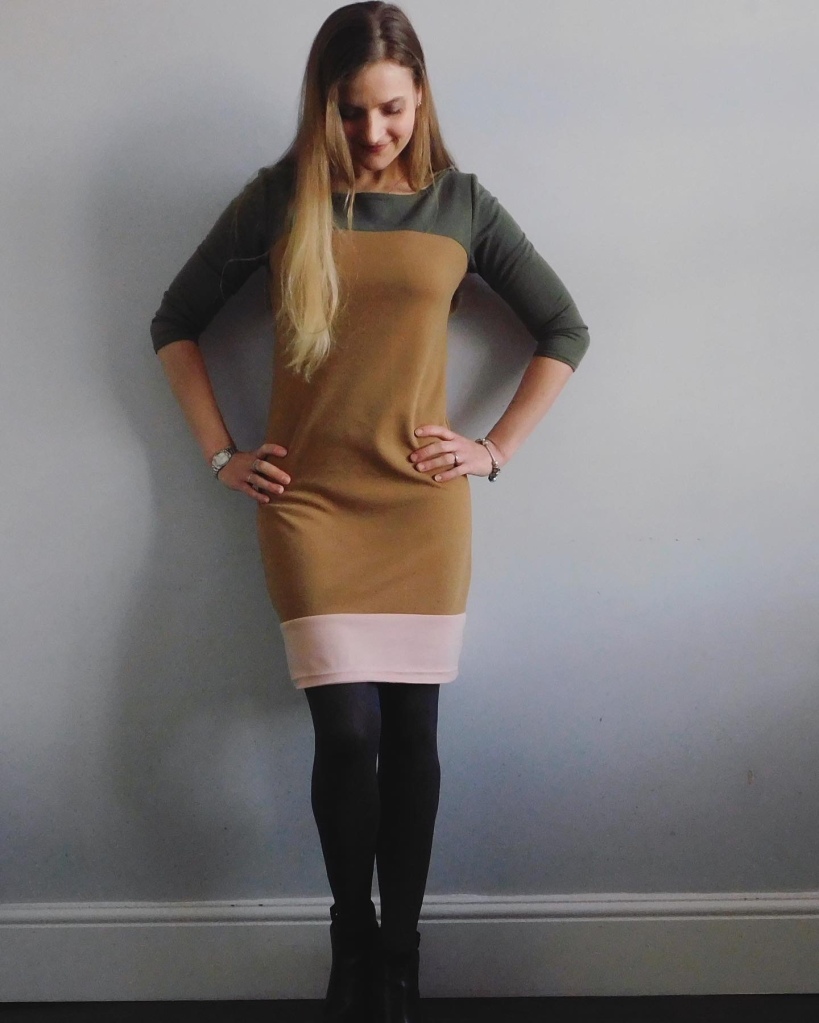
As far as jersey top/dress patterns go Edie has everything I look for. Itā€™s got a simple construction, the shape is flattering and sizing is spot on. A cherry on top is the boat neckline that highlights collarbone and 3/4 sleeves, which are long enough to hide my arms (a feature both practical and aesthetically appealing to me) and short enough to stay away from ink (something that is particularly useful if you take notes by hand at work or Uni).

As with every basic pattern, this one is perfect for hacks. You can easily experiment with different neckline styles, shorten or lengthen the sleeves, or, as I did with the one below, colour block it. Possibilities are endless if you use it as your basic block for knits.

Iā€™m obviously a big fan. My fourth version is already waiting for assembly šŸ¤¦ā€ā™€ļø Have you tried it yet?

Till the next time!

When you donā€™t have millions to spend on patterns…

Pattern: Off-shoulder romper

When you donā€™t have millions to spend on new patterns you certainly donā€™t need to stand on one leg and do pseudo-yoga poses whilst hoping that the Universe is going to drop some on your head for free…

What you may want to do is to familiarise yourself with Ellie and Mac patterns. Personally, I find them hit and miss aesthetically and you really need to look at the line drawings, but there are some fantastic classic and classy designs.

Pattern: True beauty

Having said that, all of them come with fantastic set of instructions, they are customisable (after all thatā€™s why we sew) and some of them are absolute gems. The kicker is that, if youā€™re patient, you can get them for $1. Yes, your eyes are not deceiving you. I wrote (and meant to) $1.

So whatā€™s the catch?

There is none. Ellie and Mac run weekly sale they call Whacky Wednesday and each week they feature a different pattern. Majority of their offering is designed for stretch fabrics but there are some for woven too.

They do swimwear and cater for kids and men which led to this little twinning set:

Patterns: Chill tee
and
Around the block hoodie

Till the next time!

All the Lansdownes…

Caught the bug. Canā€™t stop now.

Thereā€™s no other way to put it but to own up to the fact that making my own lingerie has sucked me in. I love it. I love how it makes me think creatively and how amazing it makes me feel to have a nice new set to prance around in (obviously weā€™re talking at home in front of my husband at most but mostly with no witnesses)

After getting the right fit on the Black Beauty and whipping up a few versions I was ready for the next challenge and why not try to make the style Iā€™d normally go for in the shops? So… when I saw the design lines of the Lansdowne bra by Orange Lingerie I was sold.

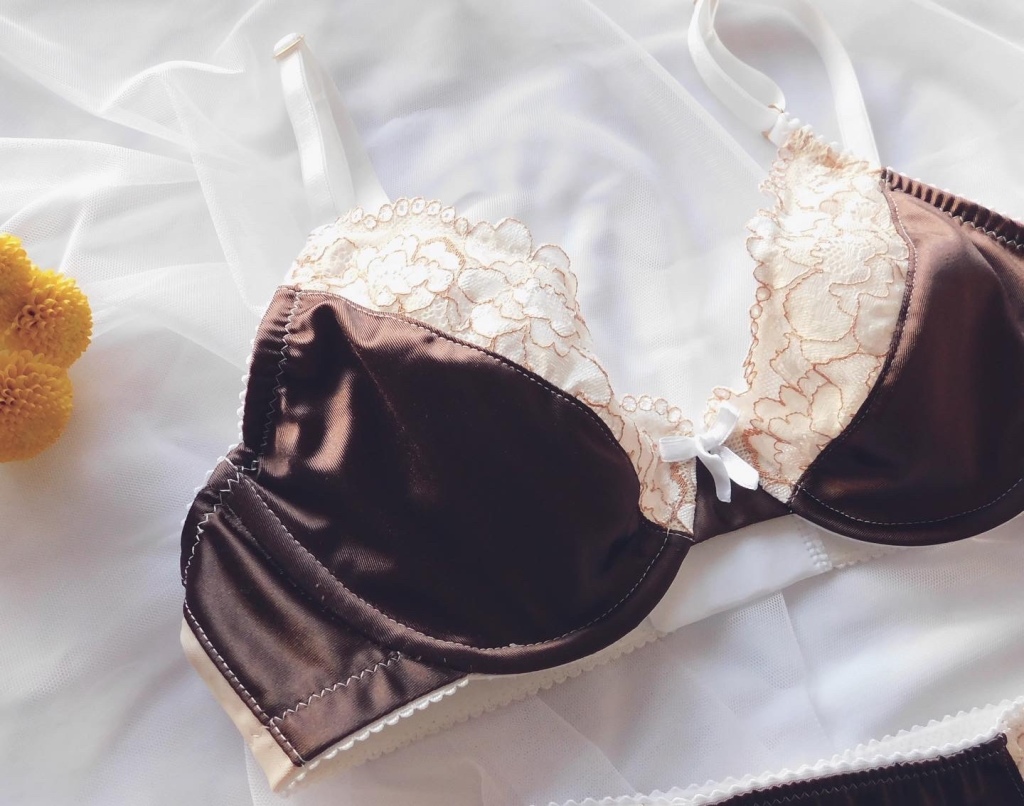
My first attempt was in this chocolate duoplex and, whilst I was pleased, my husband compared it to underwear his granny would wear. Which is not exactly what Iā€™m going for.

Yet again, I paired it with Megan Nielsenā€™s acacia panties and I really like the fit and comfort of this set. I may just have to use it as a signalling set šŸ˜…

On my second go I decided to be a bit more adventurous and I amended the top cup pattern piece to achieve this ruched effect.

The process I used can be found in the Bare Essentials book and if you need further hand holding @emeralderin in her Instagram stories has a section where you can watch her do it.

Finally, I decided to further challenge myself and create a version with foam cup lining.

It was definitely a learning curve but I managed to do it and with a very neat finish inside and out.

I explain this process in my highlights so head over to my Instagram if youā€™d like to see more on altering the pattern.

All in all itā€™s been an inspiring pattern but, funnily enough, I actually prefer this style only with additional padding and the pattern comes without it. I think the soft cup versions are nice but just donā€™t give me the same effect. I may try to make another version or two in the future just to test the theory šŸ˜…

Till the next time!

Plum!

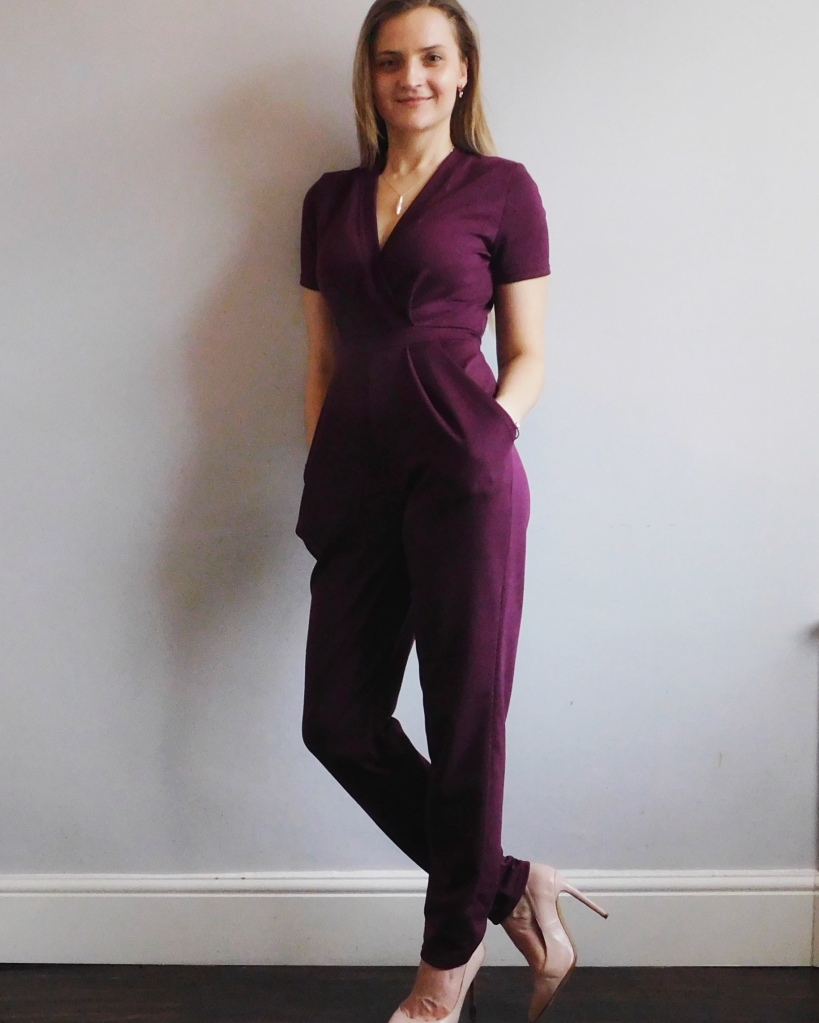
After my grey Camille jumpsuit making Sirocco by Deer and Doe was only a matter of time. There was such a hype about this pattern and I totally can see why. Itā€™s equally suitable for a casual look and office or wedding guest attire.

Initially I wasnā€™t convinced that this plum gorgeousness had enough stretch but having worn it and washed it a few times I think the fabric choice was actually spot on. The recovery is really good and this means that the garment looks good all day.

On my second try I used the same black ponte that I also made my Bibi from (see my TATB Stretch post) and I decided to give it to charity in the end.

It was comfy and classic but bu the end of the day the waistline was edging closer to my hips and the legs were getting outstretched around the knees. Iā€™m sure someone else will have a great use out of it but I knew that this would prevent me from wearing it and thatā€™s just wasteful.

So… if you asked me, Iā€™d recommend a more stable knit fabric. Ponte and scuba tend to be the safer option but do check the recovery. Last thing you want is a misshapen garment after you spent hours putting it together…

Till the next time!

TATB Stretch

Bibi in imitation leather

Have you ever heard the expression ā€œpush presentā€? Well.. I was very demanding when asked what Iā€™d like after having our second child. I asked for Tillyā€™s book ā€œStretchā€. It took me 18 months after our Matylda was born to actually give it a go.

I started from the Freya top and dress and made it into this wardrobe basic.

I really like the pattern. It comes together very easily (and I wouldnā€™t expect any less from Tilly), the fit is great, and style flattering and versatile… Are you waiting for a ā€œbutā€?

My only complaint with this make was totally my own doing. I havenā€™t checked the fabric stretch % and getting my head through the neckline deserves itā€™s very own push present šŸ¤Ŗ

The second pattern I used from this book was Bibi and, again, I loved how easy it was to put together and how simple and versatile the design is. And yet again I was let down by the fabric. This time though ponte I used was of very poor quality (despite being bought in a reputable shop and costing more than some other ponte I used in the past šŸ¤·ā€ā™€ļø)

Iā€™m stubborn though so I tried it again. This time I used this imitation leather with lovely stretch and recovery and I think itā€™s a success.

I have a couple of Freya renditions planned for this winter because despite my hiccup I really like the pattern. I also have Stella set copied and ready to cut out so expect more ā€œStretchā€ makes from me in the near future!

Till the next time!

Mustard on bias

If thereā€™s one thing that I know about myself itā€™s that Iā€™m stubborn. Particularly when I have a new sewing idea. If I visualise a particular fabric for my project Iā€™ll spend weeks looking for it until I find it and if shipping from land far far away has to happen, so be it.

This McCalls 7931 was always meant to be made in mustard yellow jacquard with animal print. I saw a similar thing on Christie Ressel and I loved all the styling options it offered. By sheer strike of luck I didnā€™t have to order this fabric from abroad. In fact, this is a designer deadstock that I snapped for cheap on eBay.

I obviously struggled with my face here. This would easily get me a role in the Mean Girls šŸ¤¦ā€ā™€ļø

I was petrified that Iā€™d ruin this lovely jacquard because Iā€™ve never seen anything on bias prior to this skirt but I followed Mimi Gā€™s advice to:

1) cut out flat with rotary cutter (my preferred method anyway

2) keep it pinned to the pattern pieces and handle as little as possible before sewing

3) stay stitch (Mimi actually recommends all around but I only went for that on waistline. Worked well but I will do as Mimi says in the future)

Another tricky part was sewing in the invisible zipper. I used my usual method of basting first with regular zipper foot but it was still the part where seam ripper was my best buddy. Iā€™m glad I took the time though because a wavy zipper would really let this make down.

If you worry about hemming you can always use my little cheat tip:

Sew along the hem with longest stitch setting to help with ironing the hem. Then, fold and stitch as close to the fold as you dare (still on the longest stitch setting). Finally, trim the hem allowance close to your stitch line, fold, iron and stitch the hem using your regular stitch length. All left to do from here is removing the basting and youā€™ll have a neat narrow hem without fuss.

I wore this skirt to work on several occasions paired with black turtleneck and ankle boots and itā€™s a great addition to my professional wardrobe. Love this classic and flattering shape.

Till the next time!

Wishful thinking…

If only I could get one sewing wish to come true today it would be for Julia Dzwonczyk of Twoje Wykroje to finally release English version of her patterns. They are wonderfully designed, totally hackable (totally a word), and she supplies you with an array of hacks for each of her designs.

This skirt pattern features two side pockets that are sewn by folding over side panels.

This means that fabric usage is a little bit higher, but it’s unique and eye catching whilst being totally discreet at the same time.

The original pattern features elasticated waist, which normally doesn’t appeal to me, but I’m going to try it next time because all the versions I’ve seen are so flattering that I decided to give it a try someday.

For adding the button placket and the waistband I followed Julia’s instructions from the blog. Whilst that worked in terms of construction, I do think it came out a bit on the tight side (either that or Christmas turkey went straight to my midriff šŸ¤­).

I am considering adding a little extension to the waistband, but that’s not exactly on top of my priority list right now so I may revisit the idea when I finally give up hope of loosing the remaining bits of pregnancy weight (although I’m not sure I can still call it that way because the baby is 18 months old already).

What would you do?

Till the next time!

Va va voom!

It’s been a while I know…

Last few weeks of the year are always such a blur. Work is busy, house is busy and I still try to do some sewing in between. Something had to give and that something was writing.

But fear not. I’ll be catching up with my makes over the next few weeks. For now… I’m back with a bling. That is a bang!

Meet my sparkly wiggle dress by patterns for pirates!

She’s made of this stretch sequin fabric I found on eBay:

I did a bit of research before making it and decided to use lining because the sequin mesh was actually quite see through and because nobody wants scratchy seams.

I essentially just cut out two dresses. One in main fabric and one, slightly shorter, in lining. I then assembled it as per instructions to the point where you have hemming and neckline to finish. (Elastic was in but not turned in and topstitched). I then stitched lining to the dress at the neck, sleeves and around the zip, understitched at the neck and sleeve and then hemmed with bias binding.

The instructions don’t include lining so I played it by the ear and I am rather pleased with the result. My only complaint about this absolutely amazing pattern is the lack of truing up at the skirt which results in pointed hem at the seams but otherwise… love it! The variations you get with this pattern make it so incredibly versatile that I can see many iterations of this in my sewing future.

Till the next time!

How to beat the taxman with your sewing machine

Disappointing as it may be, this post will not give you pointers on how to physically assault the taxman by whacking him/her with a heavy machinery. Instead, I’ll try and show you how you can save yourself money, cheat tax gender discrimination and save the planet at the same time. You’re welcome šŸ˜… (unless you’re a man reading this, in which case this post may be a bit irrelevant for you so…)

According to charity Bloody Good Period, the average lifetime cost of having a period is minimum Ā£4,800, meaning that each month a woman spends minimum Ā£11 on sanitary products. Five percent of this cost is tax. Since, and I’m sure every woman would agree, menstruating is a bloody luxury (pun intended), women sanitary products are classified as such under the British tax regime. You hear me (read me) right ladies. We are being taxed every time we miss a precious opportunity to produce another taxpayer. Not sure how, but I’d love to see the MPs trying to tax men on each egg they failed to fertilise…

Finally, with disposable menstrual products generating more than 200,000 tonnes of waste per annum in UK alone (that’s 143,000 of average size cars or 16,000 double decker buses!) maybe it’s time to start talking about reducing the use of throw away products. I don’t say that there’s no place for them in the world but maybe we should try to switch to reusables as much as possible. This brings me to subject of cloth pads…

If you’ve ever researched the topic, cloth pads cost between Ā£2 to Ā£7 each (!) and they come in all shapes and sizes, have fantastic reviews and last for absolute years if you look after them. But if you own a sewing machine you could have your brand spanking new set for far less. They are a wonderful way to use up your scraps and even to upcycle old stuff that have no chance for second life if donated to charity.

My stash below comprises of some fat quarters that I received with my simply sewing magazine, some old leggings which had a hole in them and a babygrow which also was damaged (hence not suitable for giving to charity), zorb 1 cores and a hidden PUL layer (since on its own I heard reports about them sliding around underwear – no bueno).

I used a combination of purchased and free patterns and found them very different to apparel sewing. To be honest the first lot was a bit meh… which partially was a result of me not reading all the instructions (that thing we all do and then regret afterwards). I can definitely see some progress from the top to the bottom.

If you haven’t tried sewing them yet but would like to give it a go, here are some pointers:

1) check out tutorial by Corky from Versodile (her FB group also has some AMAZING free parents like the 9″ moonrise or 11″ curvy). Following her method was by far the easiest, fastest and produced neatest results.

2) ironing (yes, yes we THEORETICALLY all know this by now) does make a MASSIVE difference

3) walking foot really helps

4) so does ironing your core to flatten it up (especially if you’re using more than one layer)

5) and using glue stick to prevent slipping around of the absorbent later during stitching

6) donā€™t forget the topstitch line in the middle (before applying your backer) as I did on two of mine šŸ¤¦ā€ā™€ļø This helps the pad to achieve a slightly curved shape, encouraging the core to bend properly

7) go slowly around the edges

8) maybe try metal snaps (I find them less bulky than kam snaps), or if you’d rather miss them out, there’s a H shape option for you too

9) try different lengths and shapes so you can see what you like to sew and wear

10) sign up to the FB groups dedicated to the topic. They are absolutely packed with information about best materials, patterns and techniques (although you really don’t have to buy anything if you have a couple of old bath towels, water repellent fleece and some cotton scraps lying around). They are a fantastic place to discuss what is good to use as core (the absorbent “stuffing” layer), topper (on top, touching your skin) and backer (on the back, preventing leaks).

11) this is the project where clips definitely win over pins, particularly when attaching the waterproof layer (it stops being waterproof once you push a hole through it)

12) be prepared to get sucked into this. There’s something oddly therapeutic about making them.

Thoughts about parents…

You probably don’t need one. The construction is simple enough so you could just trace your favourite disposable but I would recommend buying at least one purely for the great knowledge in instructions.

The easiest to sew for me is probably Abby by Happy Hippos (free).

The second simplest but also the most discreet in the bag is simply curvy from stargazing seamstress as you can fold it into a little parcel.

My favourite shape are two free Versodile (donā€™t make me choose) although the moonrise wings are totally THE cutest.

And my favourite night one (pending actual testing in action) is Catherine by Dandelion. Itā€™s long, wide and pretty (which isnā€™t a must but a massive plus when youā€™re moody and feel sorry for yourself).

Hope this helps.

Till the next time!

Design a site like this with WordPress.com
Get started